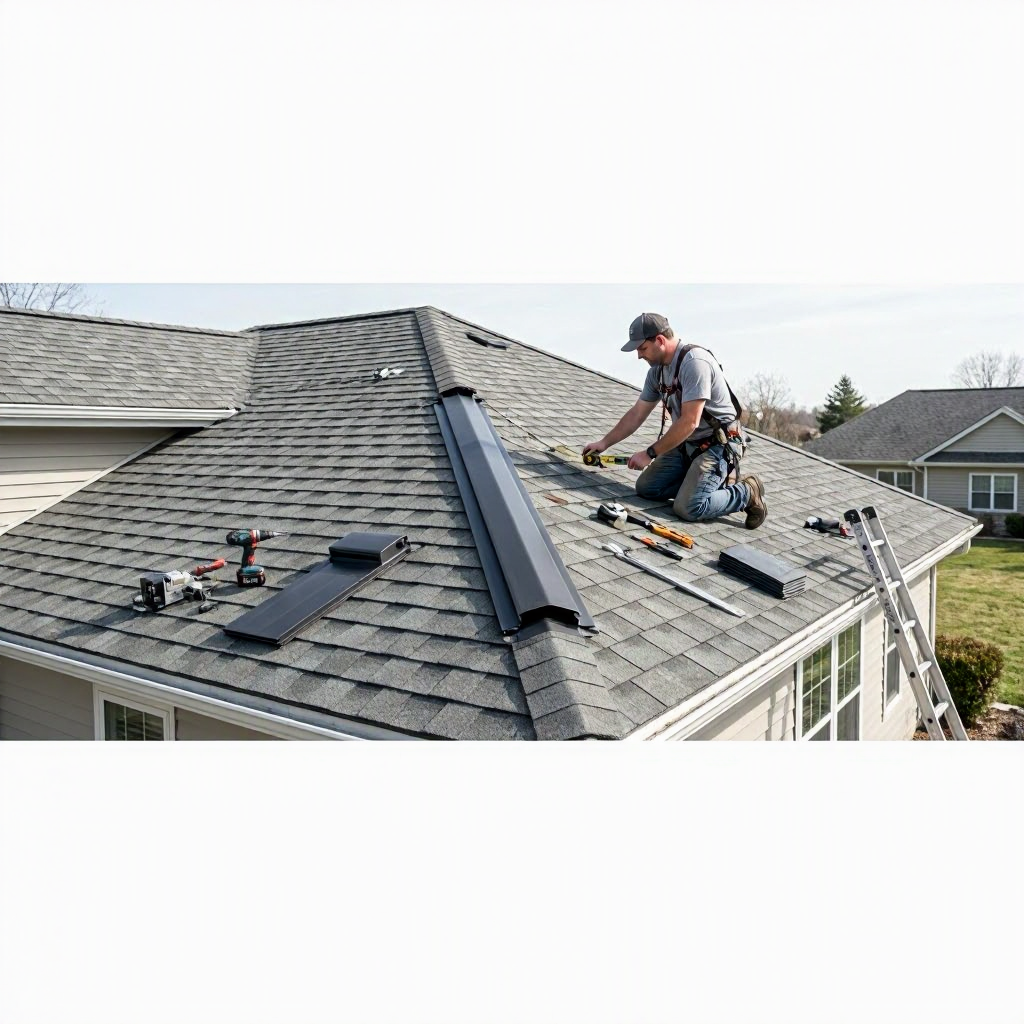
Ridge Vent Installation Cost
Getting a new ridge vent installed can feel like a big decision. You’re not just picking a part for your roof; you’re managing a project that involves costs, contractors, and home comfort. This guide is designed to give you the practical information you need to plan your budget, hire the right professional, and protect your investment.
You'll find clear price ranges, learn who to contact for different situations, and get steps for handling warranties or insurance claims. We'll also cover important checks to make before hiring and warning signs to avoid. The goal is to help you make an informed, confident decision about this key home repair.
Ridge vent installation typically costs between $300 and $650 for a standard project. This price can be higher for larger homes, steeper roofs, or difficult access. The best time to install a ridge vent is often during a full roof replacement, as the contractor can integrate the work seamlessly. Always contact a licensed roofing contractor who can calculate your home’s proper intake and exhaust balance for effective ventilation.
Additional reference details:
- Item: Typical Cost , Detail: $300 – $650 for a standard installation.
- Item: DIY Cost , Detail: Not recommended for most homeowners due to safety and warranty risks.
- Item: Pro Service Cost , Detail: Includes labor, materials, permits, and disposal.
- Item: Best First Contact , Detail: A licensed/registered roofing contractor.
- Item: Main Safety Warning , Detail: Ridge vent without proper soffit/intake ventilation may not work well.
- Item: Warranty Proof Needed , Detail: Photos, invoices, installation date, contractor info, and warranty registration.
- Item: When to Call a Pro , Detail: For leaks, flashing, ventilation work, or any roof repair involving safety risks.
Who should I call first
- Who should I call first? A licensed roofing contractor for an inspection and quote.
- What will it cost? Expect a typical range of $300 to $650, with many factors affecting the final price.
- What proof is needed for warranty? Keep photos, invoices, warranty documents, and the contractor's diagnosis.
- Which state or local office should I check? Always check with your local building department and your state’s contractor licensing board.
- What are the warning signs? A roofer pressuring you to sign after a storm, a vague quote, or a request to skip permits.
- When should I avoid DIY? For leaks, flashing, structural repairs, or any work that involves fall risk or could void your warranty.
| Data Point | Useful Information |
|---|---|
| Main Customer Question | What is the cost to install a ridge vent, and who should do it? |
| Best First Contact | Licensed/registered roofing contractor. |
| Estimated Cost Range | $300 – $650 for a typical project. |
| Labor Charges | Included in the total project cost; ask for a detailed breakdown. |
| Fitting or Installation Contact | The roofing contractor handles the entire installation. |
| Official Brand Contacts | GAF, Owens Corning, and CertainTeed for product warranty claims. |
| Retailer Contacts | Home Depot: 1-800-466-3337; Lowe’s: 1-800-445-6937 |
| Warranty Claim Documents | Photos, invoice, model/brand, contractor diagnosis, warranty documents. |
| State/Local Agency to Check | Local building department and state contractor license board. |
| Safety Warning | Ridge vent without proper soffit/intake ventilation may not work well. |
| Important URLs | See "Sources and Verification Notes" section for official links. |
| Contact Numbers | See "Official Brand, Retailer, or Agency Contacts" section. |
Understanding the full cost breakdown is crucial for comparing quotes. A low quote may exclude necessary items, while a high quote might be justified by difficult access or premium materials. Always ask for a written quote that separates these line items.
Additional reference details:
- Line Item: Ridge Vent Installation , Typical Planning Range / Note: $300 – $650 typical project range.
- Line Item: Remove Old Vent , Typical Planning Range / Note: $50 – $300+.
- Line Item: Add Soffit/Intake Vents , Typical Planning Range / Note: $300 – $2,000+. This is often necessary for a balanced system.
- Line Item: Roof Replacement Integration , Typical Planning Range / Note: Often included or discounted with a full roof replacement job.
- Line Item: Attic Ventilation Inspection , Typical Planning Range / Note: $100 – $400.
Average Cost: The national planning range for a ridge vent installation is $300 to $650, but your final price depends on your roof and local labor rates.
Costs can change based on several factors:
- Local labor rates vary by region.
- Emergency timing (like after a storm) may incur higher fees.
- Material grade (basic vs. premium vents) affects price.
- Access difficulty on steep or multi-story roofs increases labor.
- Permit requirements from your local building department add fees.
- Hidden damage found after work begins, like rotted decking, will increase the scope and cost.
Always ask what is included, what is excluded, and what the plan is if hidden damage is found once the work begins.
Installing a ridge vent is a major roofing project. It involves precise cutting along the peak of your roof, integrating new shingles, and ensuring the attic ventilation is balanced. For these reasons, DIY is generally not recommended.
- When DIY May Be Safe: Only for very minor, non-structural maintenance that does not involve cutting the roof deck, working at height, or altering the ventilation system.
- Tools/Skills Needed: Professional-grade roofing tools, fall protection equipment, and extensive knowledge of roofing codes and ventilation principles.
- When to Call a Licensed Professional: For any installation, repair of leaks, flashing work, or ventilation adjustments. A pro ensures the job is done safely, to code, and without voiding existing warranties.
- Warranty Risks: Most manufacturer warranties require professional installation by a certified contractor. DIY work will likely void these protections.
- Safety Risks: Roof work has a high risk of falls, which can cause serious injury. Professionals have the training and equipment to work safely.
Call a Pro If: The work involves any cutting, sealing, structural repair, or working at height. The safety and warranty risks are too great for a typical homeowner.
Your first contact depends entirely on your situation. Use this guide to find the right help quickly.
Additional reference details:
- Contact: Emergency Services , Use When: Electrical danger, fire, active structural collapse, or unsafe storm damage. , Phone / Action: 911
- Contact: Homeowners Insurance Carrier , Use When: Storm, hail, tree impact, sudden leak, or any covered peril. , Phone / Action: Use the claim phone number or app from your policy.
- Contact: Licensed Roofing Contractor , Use When: For an inspection, repair, replacement, leak, flashing, or ventilation work. , Phone / Action: Find and verify a local licensed roofer.
- Contact: GAF , Use When: You need to file a warranty claim on GAF roofing products. , Phone / Action: Use their online claim center.
- Contact: Owens Corning Roofing , Use When: You need to file a shingle warranty claim. , Phone / Action: 1-800-ROOFING (1-800-766-3464)
- Contact: CertainTeed Roofing , Use When: You need residential roofing warranty or technical services. , Phone / Action: 800-345-1145
Keep this list handy for support with products, orders, or warranty issues.
- GAF Warranty Claims: gaf.com
- Owens Corning Warranty Claims: owenscorning.com | Phone: 1-800-ROOFING
- CertainTeed Roofing Warranty: certainteed.com | Phone: 800-345-1145
- Home Depot Customer Service: corporate.homedepot.com | Phone: 1-800-HOME-DEPOT (1-800-466-3337)
- Lowe’s Customer Care: corporate.lowes.com | Phone: 1-800-44LOWES (1-800-445-6937)
Following the correct steps can make the warranty or insurance process much smoother.
- Document Everything: Before any permanent repair, photograph the roof, attic, ceilings, damaged materials, and any water entry points. Note the date and time of any storm.
- Contact the Right Party:
- - For storm/hail/tree damage, call your homeowners insurance carrier first. Ask if an adjuster must inspect before work begins.
- - For product defects, contact the manufacturer (GAF, Owens Corning, CertainTeed). Have your installation date, contractor name, photos, invoices, and warranty registration ready.
- - For workmanship problems, contact the installing roofer in writing and request a warranty response. Keep copies of all communication.
- Involve Authorities if Needed: For permit or unsafe-work issues, contact your local building department and state contractor board. Do not rely on verbal promises.
Warranty Documents Needed: Always have photos, invoices, warranty paperwork, and your contractor's information ready when filing a claim.
State-Specific or Local Checks
Rules vary greatly by location. Before hiring any contractor, use this checklist and verify with your local authorities.
| State / Area | What to Do Before Work Starts | Where to Check |
|---|---|---|
| All U.S. States | Ask your local building department if a roof permit, final inspection, or ventilation rules apply. | Local building department. |
| California | Check the contractor's CSLB license. | CSLB License Check |
| Florida | Verify contractor status through DBPR. Florida has high scam risk after storms. | Florida DBPR Search |
| Texas | Check city/county permit rules, insurance, and local registration. Texas does not have a single statewide roofing license. | Texas TDLR Verify |
| Illinois | Verify the roofing license through IDFPR. | Illinois IDFPR Roofing |
| New Jersey | Check home improvement contractor registration with NJ Consumer Affairs. | NJ Contractor Verification |
| New York / NYC | Check local contractor and permit rules. In NYC, use DOB resources. | NYC Buildings |
| Washington | Verify contractor registration and bonding through WA L&I. | WA L&I Verify |
| Arizona | Check the Arizona Registrar of Contractors. | AZ ROC |
Do Not Ignore: Always check with your local building department for permit requirements before any major roof work begins.
A trustworthy contractor will have clear answers to these questions. Get everything in writing.
- Ask for their license/registration number, insurance certificate, and workers’ compensation proof.
- Ask if the quote includes tear-off, underlayment, flashing, drip edge, ridge/soffit ventilation, disposal, permits, and final cleanup.
- Ask for photos of damaged areas before and after repair, especially for leaks, decking, and flashing.
- Ask to specify the material brand, square footage, and warranty details in the contract.
- Ask what will happen if hidden damage is found after the work has started.
Be cautious and consider looking for another contractor if you encounter any of these warning signs.
- A roofer appears at your door unsolicited after a storm and pressures you to sign a contract immediately or hand over an insurance check.
- The written quote is vague and does not name specific materials, warranty terms, or the scope of ventilation work.
- The contractor asks you to skip pulling permits, avoid talking to your insurance company, or hide existing damage from an adjuster.
- They request full payment upfront before any materials are delivered or work has begun.
Practical Step-by-Step Guidance
Follow these steps to navigate your ridge vent project from start to finish.
- Assess the Situation: Is this a repair for an existing leak, part of a roof replacement, or an upgrade for better ventilation? Understanding the goal helps frame your conversations.
- Contact Your Insurance (if applicable): If the work is due to storm or sudden damage, call your insurance carrier to start a claim before authorizing permanent repairs. You may still need emergency tarping.
- Research and Verify Contractors: Get at least two or three written quotes. Use the state and local resources provided earlier to verify each contractor’s license and insurance.
- Compare Detailed Quotes: Ensure each quote includes the same scope: materials (brand and type), labor, permit fees, disposal, and warranty terms. Ask questions about anything that’s unclear.
- Secure the Contract: Once you choose a contractor, sign a detailed contract that includes payment schedule, start/end dates, and procedures for handling unexpected issues.
- Document the Process: Take photos before, during, and after the work. Keep all invoices, permits, and warranty documents in a safe place.
- Complete Final Inspection: Ensure the contractor obtains any required final inspection from the local building department and provides you with copies of all close-out documentation.
Frequently Asked Questions
Should I get more than one quote? Yes. For non-emergency work, get at least two or three written quotes. Make sure they are for the same scope of work, materials, and include permit and warranty terms for a fair comparison.
Should I pay the full amount upfront? No. A reasonable deposit may be normal, but paying the full amount before work starts is risky. Check your state’s rules on contractor deposits and always use a traceable payment method.
Can I use my home warranty? Maybe. Coverage depends entirely on your specific home warranty contract, maintenance history, and exclusions. Call your warranty company before authorizing any non-emergency work if you hope for reimbursement.
Should I call insurance before a roofer? For damage from storms, hail, wind, or tree impact, you should call your insurance carrier before permanent repairs when possible. They will guide you on the claims process, though emergency mitigation like tarping may be needed immediately.
Do roofing warranties cover labor? Sometimes, but not always. Manufacturer product warranties, enhanced system warranties, and the contractor’s own workmanship warranty are different documents. Read them carefully to understand what is covered.
Can I repair a roof myself? Small maintenance can be possible, but most roof work involves serious fall risk and can void manufacturer warranties. Repairs for leaks, flashing, vents, or structural issues should always be handled by qualified professionals.
This article was built using factual information from the following sources for cost ranges, official contacts, and verification pathways:
- Angi Ridge Vent Cost: angi.com
- Angi Roof Repair Cost: angi.com
- HomeAdvisor Roof Replacement Cost: homeadvisor.com
- GAF Warranty Claims: gaf.com
- Owens Corning Warranty Claims: owenscorning.com
- CertainTeed Roofing Warranty Claims: certainteed.com
- California CSLB: cslb.ca.gov
- Florida DBPR: myfloridalicense.com
- Illinois IDFPR: idfpr.illinois.gov
- New Jersey Consumer Affairs: njconsumeraffairs.gov
- Home Depot Contact: corporate.homedepot.com
- Lowe’s Contact: corporate.lowes.com
Important: Local building codes, permit requirements, warranty terms, and contractor licensing rules can change. Always verify the most current information with your local building department, state licensing board, and the official brand websites before making final decisions or authorizing work.
This guide provides practical information to help you plan and manage a ridge vent installation project. It is not a substitute for professional advice. For your safety and to protect your home investment, always verify details with licensed roofing professionals, official manufacturer support, your insurance carrier, and local building authorities. Use the contacts and verification steps provided to make confident, informed decisions.

About the TDL Expert Panel
TDL Expert Panel · TheDigitalLife Editorial Team
TDL Expert Panel is the editorial team behind TheDigitalLife. The team researches, reviews, and creates practical guides to help everyday readers make better decisions about home repair costs, refunds, AI tools, digital safety, productivity, and useful online resources. Each guide is written to be clear, useful, and easy to understand.