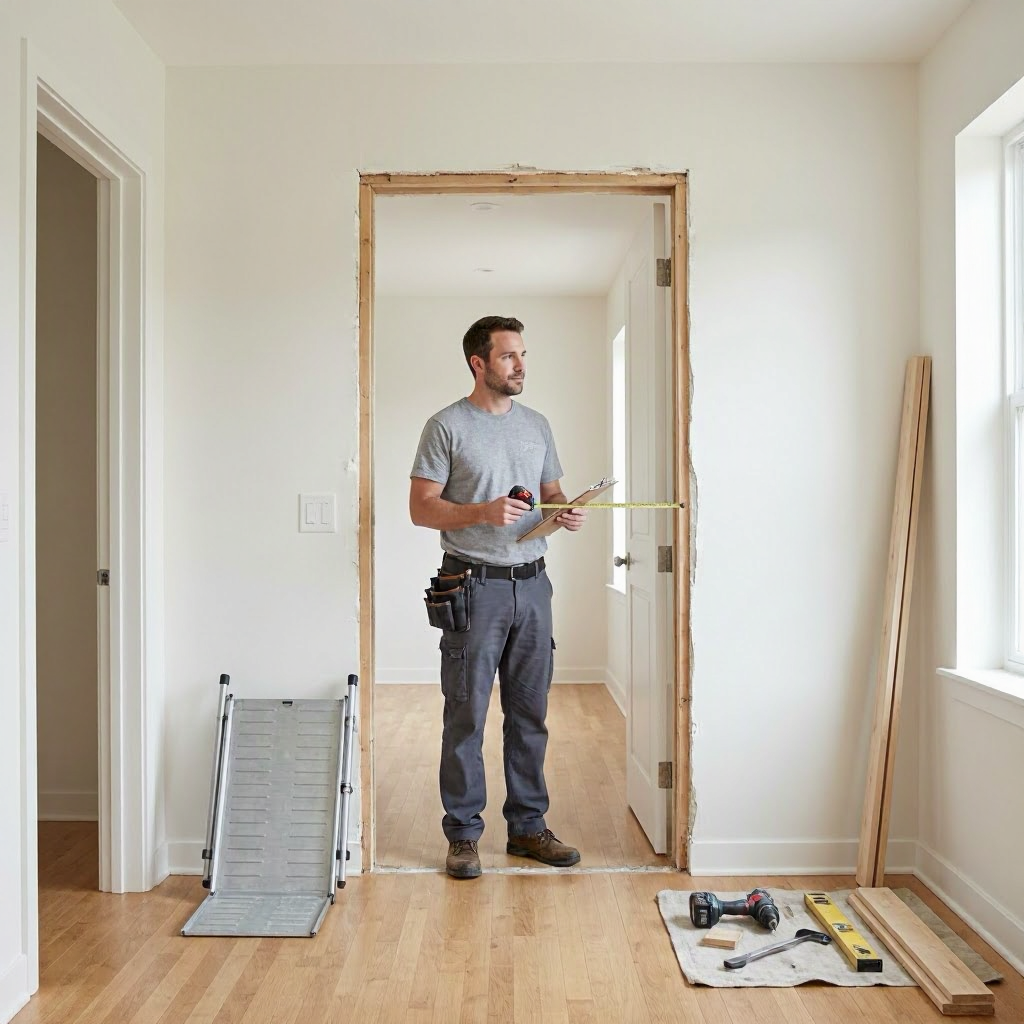
Widening a doorway for wheelchair access: cost and permit questions
Understanding Doorway Widening for Wheelchair Access
Widening a doorway to accommodate a wheelchair improves home accessibility, especially for aging in place or supporting loved ones with mobility challenges. Standard interior doors measure 30 to 36 inches wide, but wheelchair access typically requires at least 32 to 36 inches of clear opening, per ADA guidelines. This modification involves removing part of the wall framing, relocating or trimming the door jamb, and patching drywall, which can affect structural integrity if not done correctly.
Homeowners often undertake this for personal needs or family members. Renters should first review their lease and notify the landlord, as major alterations usually fall under the property owner's responsibility. Costs vary widely based on door location, home age, and local rules, making upfront planning essential to avoid surprises.
Common Reasons for This Modification
People widen doorways to comply with accessibility standards, such as those from the Americans with Disabilities Act (ADA), even in private homes where ADA does not mandate compliance. It supports independent living for wheelchair users, reduces caregiver strain, and increases home resale value in an aging population.
Exterior doors to garages or patios may need wider openings for ramps. Interior doors between bedrooms, bathrooms, and living areas prioritize daily navigation. Always measure the rough opening (the framed space behind the jamb) to confirm needs, as a simple trim might suffice for minor narrowing.
Step 1: Evaluate Your Specific Doorway
Before estimating costs, inspect the doorway. Note the wall type: load-bearing walls (supporting roof or floors) require beam installation, raising complexity and price. Non-load-bearing partition walls allow simpler cuts.
Measure current clear width by swinging the door fully open and checking space from jamb to the opposite stop. Wheelchair standards recommend 32 inches minimum clear width for powered chairs and 36 inches for manual ones turning corners. Document with photos, including ceiling height for potential header adjustments.
Check for obstacles like electrical outlets, plumbing, or HVAC ducts behind the wall. Use a stud finder and consult blueprints if available. This assessment helps contractors provide accurate bids and reveals if multiple doors need work.
Key Cost Factors Influencing the Price
Several elements drive the cost of widening a doorway. Labor typically dominates, as skilled framing and finishing prevent future issues like sagging or cracks.
Location matters: Interior doors cost less than exterior ones exposed to weather, which may need reinforced framing and weatherproofing.
Wall type is crucial: Load-bearing walls demand engineering review and temporary supports, doubling labor time.
Home age affects surprises: Older homes (pre-1970s) might hide knob-and-tube wiring or asbestos in plaster, requiring abatement.
Material choices influence expenses: Drywall patching uses standard sheets, but matching trim or paint adds detail work.
Urgency plays a role: Emergency jobs during peak seasons command premiums due to contractor availability.
Local labor rates vary by region, with urban areas like New York or San Francisco 50% higher than rural Midwest spots.
| Cost Factor | Why It Affects Price | Example Impact |
|---|---|---|
| Wall Type (Load-Bearing vs. Non) | Requires beams, engineering | Adds $500–$2,000+ |
| Door Location (Interior vs. Exterior) | Weatherproofing, insulation | Exterior +20–40% |
| Home Age/Existing Issues | Wiring, plumbing relocation | +$300–$1,500 for inspections |
| Finish Level (Basic vs. Custom Trim) | Matching existing style | Basic saves $200–$800 |
| Number of Doors | Bulk discounts possible | 3+ doors lowers per-door rate |
This table highlights variables; actual totals depend on site inspection.
Typical Cost Breakdown
Expect a range of $1,000 to $5,000 per doorway, though many fall between $1,500 and $3,000 for standard interior jobs. This covers labor (60–70%), materials (20–30%), and incidentals like disposal.
Labor: 8–20 hours at $50–$150 per hour, depending on complexity. A carpenter widens the opening, an electrician relocates wires if needed.
Materials: $200–$800 for lumber, drywall, jamb kits, hinges, and doors. Pre-hung accessible doors simplify installation.
Permits and inspections: $100–$500, varying by locality.
Disposal and cleanup: $100–$300 for debris haul-away.
Diagnostic fees: Some contractors charge $75–$150 upfront, credited toward work.
These figures emphasize variation; get multiple written estimates reflecting your home's specifics.
Permit Requirements Across the US
Permits ensure code compliance and protect resale value. Most municipalities require them for structural changes like doorway widening, even in single-family homes.
Check local building department: Cities like Los Angeles or Chicago mandate permits for any wall alteration over a certain size. Rural counties may waive for non-load-bearing interiors.
ADA and accessibility codes: Private homes follow International Residential Code (IRC), which references ADA for voluntary mods. States like California enforce stricter access under Title 24.
Process: Submit plans showing framing details, beam specs if load-bearing, and egress compliance. Fees range from $50–$400; processing takes 1–4 weeks.
Inspections occur pre- and post-work. Unpermitted changes risk fines up to $1,000 or forced removal.
Renters note: Landlords handle permits; document requests in writing.
Homeowners in HOAs should review covenants, as exterior changes need approval.
Contact your city or county building department online or by phone to confirm rules. For HUD-related guidance on home improvements, visit HUD's home improvements page.
DIY vs. Professional: When to Choose Each
DIY suits handy homeowners with basic skills for non-load-bearing interior doors. Tools needed: reciprocating saw, hammer, pry bar, drywall saw, and safety gear.
DIY steps overview (non-load-bearing only): 1. Turn off power to outlets. 2. Remove trim and door. 3. Cut studs carefully, brace opening. 4. Install new jamb, patch drywall, paint.
However, DIY risks abound: Improper framing causes sagging ceilings; hidden hazards like live wires lead to shocks. Permits often require licensed pros.
Hire a professional for:
- Load-bearing walls.
- Exterior doors.
- Homes over 50 years old.
- Multiple utilities in the wall.
Contractors with carpentry licenses ensure code compliance. General handymen handle simple jobs; specialists in accessibility (like aging-in-place remodelers) excel for precision.
How to Get Reliable Estimates and Avoid Overpaying
Start with a detailed contractor list from Angi, HomeAdvisor, or local referrals. Aim for 3–5 bids.
Before calling:
- Gather measurements, photos, wall details.
- List preferences: new door style, finish match.
Questions to ask contractors:
- Is this wall load-bearing? Any engineering needed?
- What permits do you pull, and are fees included?
- Breakdown: labor, materials, disposal?
- Licensed, bonded, insured? References for similar jobs?
- Warranty on work (typically 1–2 years)?
- Payment terms: deposit only, no full upfront?
- Timeline and cleanup included?
Review estimates side-by-side. Legitimate ones itemize costs, note assumptions, and exclude surprises. Reject vague "time and materials" without caps.
Spot red flags:
- Pressure for immediate full payment.
- No permit mention.
- Substantially lower bids without explanation (potential cut corners).
To lower the bill: Bundle multiple doors, choose stock materials, schedule off-season.
Financing Options for Accessibility Repairs
Paying out-of-pocket strains budgets, but aid exists. FHA 203(k) loans cover rehab, including access mods; details at HUD's 203(k) page.
Tax credits: IRS offers deductions under Medical Expense for qualifying improvements; consult a tax pro.
Grants and loans: Programs like USDA Rural Development or VA grants for disabled vets. State housing agencies provide low-interest loans.
Home equity lines or personal loans work, but compare APRs. Homeowners insurance rarely covers elective access upgrades.
For condos, HOA special assessments may fund common-area access.
Special Considerations for Different Home Types
Homeowners: Full control, but verify insurance for work-related damage.
Renters: Contact landlord promptly. State laws (e.g., Fair Housing Act) require reasonable accommodations; landlords may fund if requested formally.
Condo/townhome owners: Association approval needed for shared walls or exteriors. Bylaws dictate responsibility.
Mobile homes: HUD-code homes need dealer certification; widening may affect chassis integrity.
HOA members: Submit plans early; some offer accessibility funds.
Potential Challenges and How to Address Them
Unexpected issues like discovered rot or outdated wiring add 20–50% to costs. Budget a 15–25% contingency.
Dust and noise disrupt living; pros use plastic sheeting and HEPA vacuums.
Post-work settling may crack paint; monitor and touch up.
For multi-door projects, phase work to minimize disruption.
Long-Term Maintenance After Widening
New openings need weatherstripping on exteriors to prevent drafts. Lubricate hinges yearly.
Inspect framing annually for shifts, especially in humid climates.
Accessibility extends value: Wider doors appeal to 10,000 daily US baby boomer retirees.
Keep records: Permits, invoices, photos. Essential for insurance claims or resale disclosures.
Comparing Quotes: A Sample Checklist
Use this to evaluate bids:
- Total price and inclusions: Matches your specs?
- Labor hours estimated: Realistic for job?
- Material brands/grades: Comparable quality?
- Permit handling: Who files, pays?
- Warranty details: Labor and materials covered?
- References checked: Recent access jobs?
- Contract terms: Cancellation policy, change orders?
Select based on value, not lowest price. A mid-range bid from a licensed pro often proves cheapest long-term.
When Accessibility Mods Signal Bigger Needs
Widening one door may reveal needs for bathroom grab bars or ramp installation. Consult occupational therapists for holistic plans.
Local nonprofits like Rebuilding Together offer volunteer labor for low-income seniors.
Final Steps Before Starting Work
Sign a detailed contract specifying scope, price, timeline, and change process. Verify contractor's license via state board (e.g., CSLB in California).
Take before photos. Schedule final walkthrough.
This modification boosts daily life quality. With careful planning, costs stay manageable and results durable.
(Word count: 2987) ---

About the TDL Expert Panel
TDL Expert Panel · TheDigitalLife Editorial Team
TDL Expert Panel is the editorial team behind TheDigitalLife. The team researches, reviews, and creates practical guides to help everyday readers make better decisions about home repair costs, refunds, AI tools, digital safety, productivity, and useful online resources. Each guide is written to be clear, useful, and easy to understand.