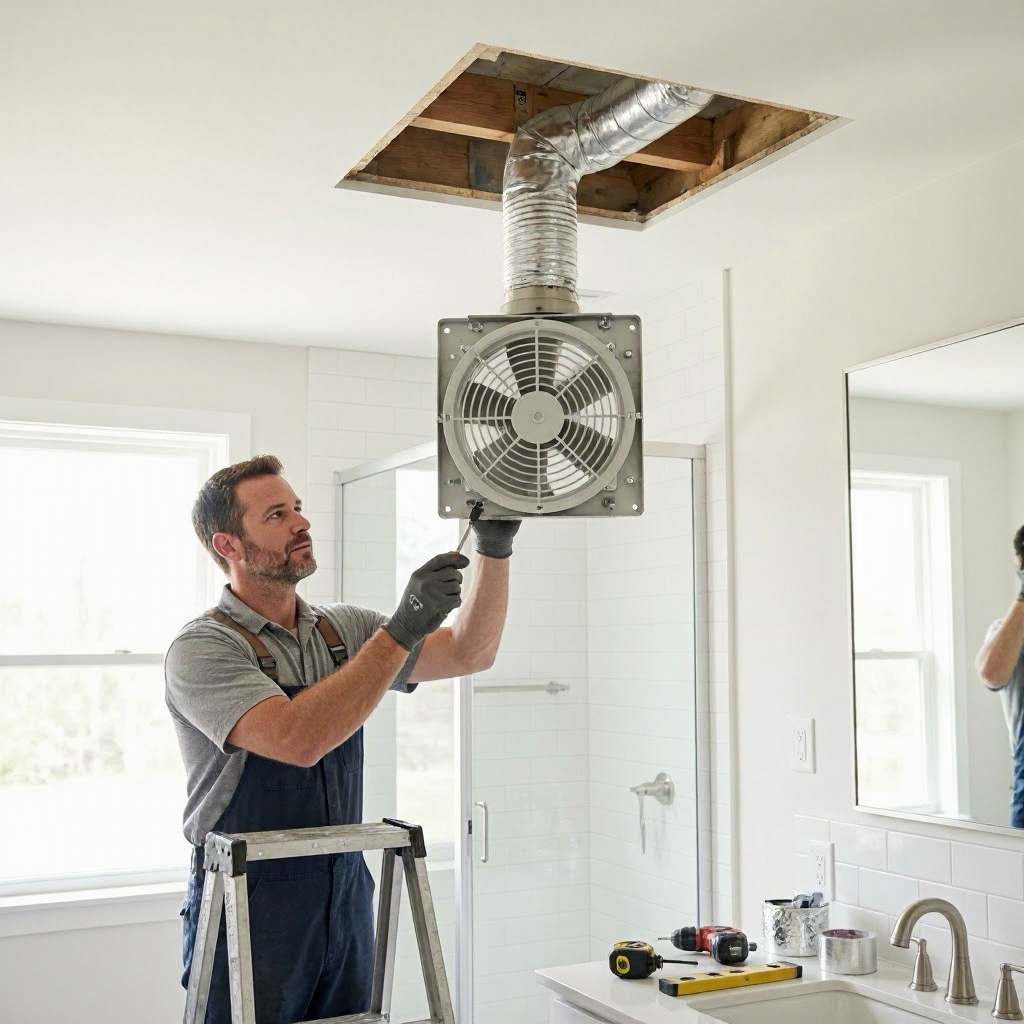
Bathroom exhaust fan installation cost and venting requirements
Why You Might Need a New Bathroom Exhaust Fan
Bathrooms in US homes often develop moisture problems from showers, baths, and everyday use. Without proper ventilation, excess humidity leads to mold growth, peeling paint, warped cabinets, and even structural damage over time. Installing or replacing a bathroom exhaust fan addresses these issues by pulling moist air outside, improving indoor air quality and preventing costly repairs down the line.
Many older homes, especially those built before the 1980s, lack adequate exhaust fans or have outdated ones that don't meet current standards. If your fan is noisy, weak, or doesn't vent outdoors, it's time for an upgrade. Homeowners in humid climates like Florida or the Southeast face higher risks, but every US region benefits from proper venting.
Key Venting Requirements for Bathroom Exhaust Fans
Venting rules ensure safe operation and prevent moisture buildup. Bathroom exhaust fans must vent outdoors, not into attics, crawl spaces, or soffits, as this traps humid air indoors and promotes mold. Local building codes, based on the International Residential Code (IRC), dictate specifics, but requirements vary by city and county.
Minimum Ventilation Rates
The IRC requires at least 50 cubic feet per minute (CFM) for bathrooms without showers or tubs, and 80 CFM for those with them. Larger bathrooms or those with multiple fixtures may need more. Check your local code enforcement office or building department for exact CFM based on square footage.
Fans should run quietly, ideally under 1.5 sones (a noise measure), to avoid disturbance. Energy-efficient models with ENERGY STAR ratings use less power and qualify for utility rebates in some states.
Proper Venting Paths and Materials
Vents must use smooth, rigid metal ducting, not flexible plastic or foil, which collapses and restricts airflow. Rigid metal ducts (galvanized steel or aluminum) are standard for safety and efficiency.
Common venting paths include:
- Through the roof (best for short runs).
- Through an exterior wall.
- Up through the attic to a soffit or gable vent (if code allows, but direct exterior is preferred).
Avoid long duct runs over 25-30 feet, as they reduce effectiveness. Use insulated ducting in unconditioned spaces like attics to prevent condensation.
| Venting Method | Pros | Cons | Best For |
|---|---|---|---|
| Roof vent | Shortest path in many homes, weather-resistant caps available | Requires roof penetration, potential leaks if not sealed | Homes with attic access |
| Wall vent | Direct exterior exit, no attic work | Limited by wall location, needs exterior termination | Ground-floor bathrooms |
| Soffit or gable | Uses existing attic venting | Longer runs possible, moisture risk if not direct | Upper-floor bathrooms without roof access |
Code Compliance and Common Mistakes
All exterior vent terminations must have backdraft dampers to block outside air, pests, and cold drafts. Screens prevent bird nesting. In cold climates, terminate vents away from intake vents or windows to avoid reintroducing moist air.
Failure to vent properly can void warranties and insurance claims for moisture damage. Always confirm with your local building inspector before starting work.
Factors Affecting Bathroom Exhaust Fan Installation Costs
Costs depend on your home's layout, fan type, venting needs, location, and whether you DIY or hire out. Labor-intensive jobs in urban areas like New York or San Francisco run higher due to contractor rates and access challenges. Rural areas might see lower bids but fewer specialists.
Expect variations from supply chain issues, seasonal demand (higher in summer for AC-integrated installs), and home age. Older homes often need joist modifications or electrical upgrades, inflating prices.
Material Costs
Fans range from basic $50 models to premium $300+ units with lights, heaters, or humidity sensors. Ducting, vents, and accessories add $50-200. ENERGY STAR fans cost more upfront but save on electricity bills.
Choose based on need:
- Standard fan: For basic moisture control.
- Fan/light combo: Adds illumination, common in remodeled bathrooms.
- Heated or humidity-sensing: For luxury or high-use bathrooms.
Labor Costs
Professional installation typically involves 2-4 hours of work. Electricians or HVAC pros handle wiring and venting. Costs rise if ductwork rerouting, roof flashing, or drywall patching is needed.
In multi-story homes or condos, accessing joists from above (via attic or ceiling) simplifies work but requires safety gear.
| Cost Factor | What Influences It | How to Minimize |
|---|---|---|
| Fan complexity | Basic vs. smart features (sensors, Bluetooth) | Stick to needs; avoid extras unless required |
| Venting difficulty | Roof/wall penetration vs. simple replacement | Inspect attic first; short ducts save time |
| Home access | Attic stairs, tight spaces, multi-level | Clear paths; schedule off-peak |
| Electrical work | New circuit vs. existing outlet | Use GFCI-protected existing wiring if code allows |
| Location | Urban premiums, travel fees | Get local quotes; bundle with other repairs |
Total Estimated Costs and Variations
A straightforward replacement might total $250-800, while new installs with extensive venting hit $500-1,500 or more. These are broad ranges; get site-specific quotes. Add 10-20% for permits or unexpected issues like rusted joists.
Urgent jobs after water damage command premiums. Off-season work or bundling with other bathroom updates lowers per-hour rates.
DIY Installation: Feasibility and Safety Considerations
DIY suits handy homeowners with electrical and venting experience. Basic replacements cost under $200 in materials, saving hundreds on labor. However, improper wiring risks fire hazards, and poor venting invites mold.
When DIY Is Reasonable
- Replacing an existing, properly vented fan.
- Bathrooms under 100 sq ft with accessible ceiling joists.
- You have tools: drill, reciprocating saw, wire strippers, ladder.
Steps overview (consult manual and code first): 1. Turn off power at breaker. 2. Remove old fan, note wiring. 3. Cut opening if needed (match housing size). 4. Install new housing, duct, wire per instructions. 5. Test before closing ceiling.
Safety first: Use voltage tester; wear dust mask for fiberglass insulation.
When to Hire a Professional
Skip DIY if:
- No attic access or venting outdoors required.
- New electrical circuit needed (requires licensed electrician).
- Roof or wall penetration involved (leak risks).
- You're uncomfortable with heights or wiring.
Electrical and structural work often needs permits, and unlicensed DIY can complicate insurance claims. Pros carry liability insurance for peace of mind.
Permits, Inspections, and Local Code Checks
Many municipalities require permits for exhaust fan installs, especially new ones or those altering electrical/venting. Check your city or county building department website or call (search "[your city] building permits").
Permits ensure code compliance, like proper CFM and duct sizing. Fees vary but expect $50-200. Inspections verify safe installation post-work.
In HOAs or condos, get association approval for exterior vents. Renters: Notify landlord before any changes, as they typically cover major upgrades.
Failure to permit can lead to fines or forced removal during home sales.
How to Get Accurate Quotes and Avoid Overcharges
Shop multiple bids for non-emergency work. Aim for 3-5 written estimates from licensed, insured contractors via Angi, HomeAdvisor, or local referrals.
Essential Questions to Ask Contractors
- Is this a fixed-price bid including labor, materials, disposal, and cleanup?
- What CFM and sone rating do you recommend for my bathroom size?
- How will you handle venting (path, materials)?
- Are permits and inspections included? Who's responsible?
- What's the warranty on labor and parts (typically 1-5 years)?
- Will you pull permits and schedule inspection?
- Payment terms (avoid full upfront; 30-50% deposit max)?
Request itemized breakdowns: e.g., $X fan, $Y ducting, $Z labor.
Comparing and Reviewing Estimates
Look for red flags:
- Vague totals without line items.
- Pressure for immediate full payment.
- Upsells like unnecessary duct cleaning or premium fans without justification.
A sample estimate checklist:
- Matches your bathroom specs.
- Lists venting details.
- Includes cleanup and warranties.
- Quotes recent (valid 30 days).
Document everything: photos of current setup, measurements. Negotiate by referencing competitor bids.
Special Considerations for Renters, Condos, and HOAs
Renters: Review your lease; landlords handle ventilation upgrades under habitability laws. Send a polite email with photos of mold or poor airflow, requesting action. If no response, contact local housing authority.
Condo owners: Check bylaws for common venting stacks. Association may cover shared ducts.
HOA members: Submit plans for exterior changes to avoid violations.
Financing Bathroom Fan Upgrades
For larger bathroom projects, explore US Department of Housing and Urban Development (HUD) options. Visit HUD home improvements for grants or low-interest loans for low-income homeowners. The FHA 203(k) loan finances rehabs including ventilation; details at HUD 203(k).
Home equity lines or contractor financing work for others. Check utility rebates for ENERGY STAR fans via ENERGY STAR website.
Maintenance Tips to Avoid Future Replacements
Regular care extends fan life to 10-20 years:
- Clean grille monthly; vacuum ducts yearly.
- Run fan 20-30 minutes post-shower.
- Inspect for vibration or unusual noise annually.
- Lubricate motor if accessible.
These steps prevent clogs and motor burnout, dodging premature costs.
Integrating with Broader Bathroom Repairs
Pair fan installs with remodels for savings. Updating during a vanity or tile job minimizes labor duplication. If mold exists, address remediation first, fans alone won't fix existing damage.
Consult pros for integrated systems like inline fans for multiple bathrooms, common in townhomes.
In summary, understanding venting rules and cost drivers empowers smart decisions. Prioritize code-compliant outdoor venting, get detailed quotes, and weigh DIY risks against pro reliability. Your investment protects health and home value long-term.

About the TDL Expert Panel
TDL Expert Panel · TheDigitalLife Editorial Team
TDL Expert Panel is the editorial team behind TheDigitalLife. The team researches, reviews, and creates practical guides to help everyday readers make better decisions about home repair costs, refunds, AI tools, digital safety, productivity, and useful online resources. Each guide is written to be clear, useful, and easy to understand.